Editor Overview
Our editor is very advanced and can be fairly daunting at first. This page will quickly give name to each of the panels/areas and provide an overview for what they’re for.
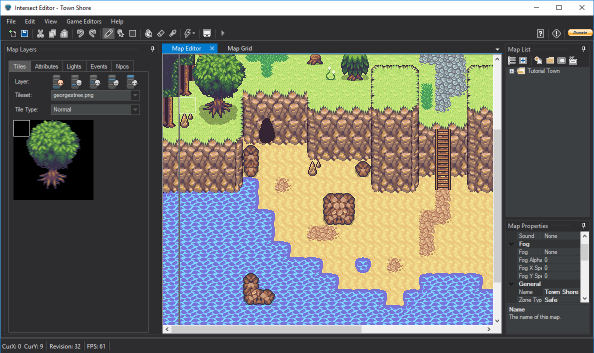
Map Editor
Let’s start with the big area in the middle. This is the map editor. Unlike the image above, your map is probably empty.
Working with the Map Layers panel on the left you can place tiles from tilesets on your map to start designing your game world.
Start Mapping:
- Click on the Pen Tool
in the menubar above your map.
- Select Tiles in the Map Layers pane.
- Use your mouse to select a tile or group of tiles to place in your empty map.
- Finally click and drag your mouse on the empty map to place your selected tiles.
- Congratulations, you’re mapping! Don’t forget to save your changes by hitting the save icon in the top left of your screen.

We won’t go in depth about the map editor here, for more information see: World Design
Map Layers
This is the area where you select different tiles, attributes, lights, events, and npcs to place on the map.
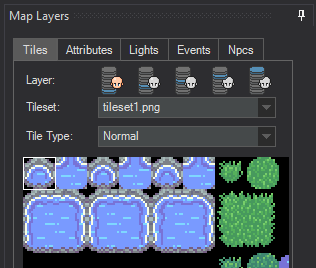
- Tiles are the graphics that actually make up the game world.
- Attributes are placed on top of the tiles and tell the game how the player can interact with them. Attributes include blocks (to prevent players from reaching unwanted areas), warps (to move a player inside houses or to different parts of the world), animations, and more!
- Lights are lights. Eventually you will configure how you want time to pass in your game and if you want your game to get dark at night. If so, you can place lights on the map to provide some really cool effects.
- Events are pretty complex. We will touch up on those later. In short they help you create your game’s story, interactions with npcs, provide quests, puzzles, and so much more!
- The NPC tab is last but not least, this is how you add combatable entities/monsters/bosses to your game world. More on that later.
Map List
A large game may have dozens or hundreds of maps. The map list is where you can navigate to and organize the maps you have created.
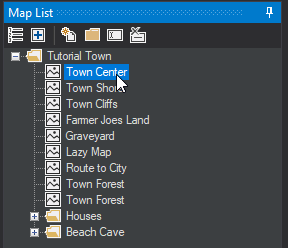
Double clicking a map on this list will open that map for you to edit. You can create folders, re-order maps, rename maps, and delete maps on this list.
Map Properties
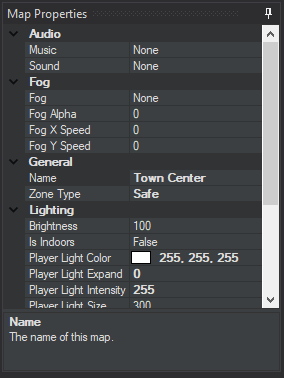
The map properties pane allows you to customize various settings for your map (e.g. BGM, name, weather, combat, lighting).
Menu Bar

The menu bar at the top of your editor is your gateway to everything else our engine has to offer. The bottom row consists of all sorts of mapping tools that are discussed in the World Design page. The File, Edit, and View drop downs all offer various mapping options that you don’t need to worry about right now.
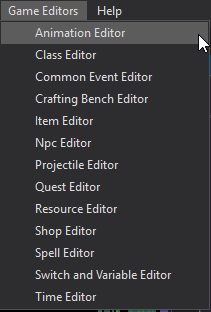
The important components of the Menu Bar are the Game Editors drop down and the Help menu.
The Game Editors drop down will give you easy access to modify all the other major components of your game.
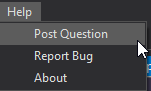
The Help menu gives you quick access to the appropriate pages within our community to as questions and alert us of any bugs that you may find.
The rest of this documentation will go over how to use each of the editors above and bring them all together to make an amazing game. When ready, press Next below to learn more about World Design.
Extra Notes
Now is probably a good time to note a nifty feature we recently added to Intersect. Open your File -> Options menu. Here you can click the Browse button and select your Intersect Client.exe.
After doing so, you will be able to hit the green play icon  in the menu bar to launch your client at any time!