Auto Updater
File storage and bandwidth costs! We do not have the capacity or funding to host your game data and updates for you. You will need to purchase a web hosting plan of your choice in order to distribute your game updates to your players.
Static site hosts like Amazon S3 will work well, but a webhost with the ability to run php is preferred for faster updates and other benefits that you might want to learn about later on.
Creating an Update
Creating an update is done from the Tools > Package Update menu at the top of the editor.
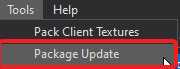
You can follow along with the instructions in this clip, or follow the packaging instructions below
Packaging Instructions
- Create 3 directories
- one that is your “live” development environment that you will be using to generate this update
- this will be the directory that contains the client and editor that you use to modify and test your game
- this directory does not contain the update URL in the configuration file
- one that is a clean “source” copy of the client and editor with their assets, but it does not contain any cache, temporary, log files, etc.
- this directory will contain the a config.json with the update URL
- it should contain the Client.exe, Client.pdb, Editor.exe, Editor.pdb, and your resources directory (which should not have mapcache.db)
- one that is the “update” of the update generation process
- the first time you run the updater this will be empty
- NOTE: when you run the updater a second time, do not clear it out first, it will clear out unchanged files and leave only what you need to upload to your file host
- Click on
Tools > Package Update - On the first window, select the “source” directory that you created in step 1 that does contain the config.json with the update URL
- On the second window, select the “update” directory that you created (or already had) in step 1
- Once the update is complete, upload all of the files in your “update” directory to your file host
Uploading
Use FTP or your file transfer program of choice to upload the contents in your update folder to your web host.
Note: If you are using FileZilla you need to make sure you are using binary uploads. Go to Edit > Settings > File transfer settings > ASCII/Binary. Set it to always binary:
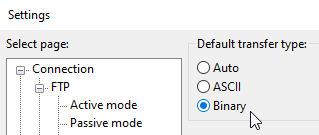 .
.
Configuring
After you have uploaded your update to your web host open up your web browser of choice and browse to the update.json file to make sure it’s online, if you are able to view your update.json file in your web browser then you are ready to proceed.
Copy the url of that file into Client and Editor/resources/config.json for the UpdateUrl field.
You are able to change the graphics and fonts on the update screen, those can be found in the Client and Editor/Resources/Updater directory.
Future Updates
To package updates going forward use the Tools > Package Update button within the editor and upload the new update to your webhost overwriting any existing files. Any new graphics or Intersect versions will be included and distributed to your players the next time they launch their game..
Advanced Configuration
The following advanced configuration options are completely optional. If you don’t know exactly why you’d want to use these then ignore them! Both of these options requires that your webhost can serve php pages and execute php scripts.
Dynamically Generate Metadata (Optional, Beta)
Instead of using the Editor -> Tools -> Package Update function to generate your update.json metadata for you, you can instead use this update.php script. The script will scan your webhost for files and automatically generate the update configuration on the fly. This is useful if you want to allow others on your team to drag -> drop assets or updates onto your webserver without needing to use the editor to package a massive update for each small change.
The downside to this script is that checking for updates will take a bit longer, so this should be used for convenience during development. When you launch your game you should use the static update.json files because they will be quicker and less demanding on your server.
After placing your script into your update folder on your webhost modify your UpdateUrl in the Client and Editor/Resources/Config.json file to point to update.php.
Streaming Downloads (Optional, Beta)
Instead of having the client open up hundreds or thousands of HTTP file downloads from your web server you can have your client request a list of files all at once and then have them send back in a single connection through a continuous stream. If you are using the update.php script above simply place this stream.php script into your update folder as well and you’ll be good to go.
If you want to use this script with static update.json files you will need to modify your update.json file to include the following line below the TrustCache line.
'StreamingUrl': 'https://<path to stream.php>',