Mapping
A large majority of your time creating a 2D ORPG will be spent designing maps in order to create an expansive game world.
The following steps will get you started on creating your first map.
Start Mapping:
- Click on the Pen Tool
in the menubar above your map.
- Select Tiles in the Map Layers pane.
- Use your mouse to select a tile or group of tiles to place in your empty map.
- Finally click and drag your mouse on the empty map to place your selected tiles.
- Congratulations, you’re mapping! Don’t forget to save your changes by hitting the save icon in the top left of your screen.

Layers
While creating your maps you may realize that you want to place objects like houses, trees, and shrubs above the ground. This is where layers come into play. Under the Tiles tab in your Map Layers panel you will see a group of five icons.
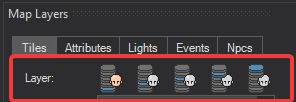
Each of these icons represent a tile layer. When you left click an icon you will switch to that layer. The character’s face on the selected layer will have a little color to it.
Tiles on the first layer will appear below tiles on all other layers. Tiles on the second layer will appear below the tiles on the third, fourth, and fifth layers.
Before going further, let’s give a name to these layers. We refer to them as:
- Ground
- Mask
- Mask 2
- Fringe
- Fringe 2
Utilizing multiple tile layers in your maps is how you can place trees, and other objects on top of other tiles.
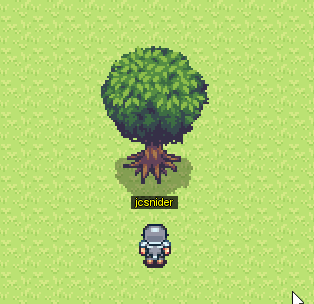
Notice how the last two layer icons are drawn over the character’s face? Those are the two Fringe layers, and they exist above players and npcs in game.
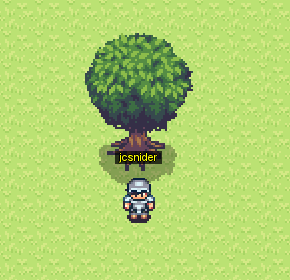
In the demo above I placed entire trees on the Mask layer. The tiles on the Ground layer and the trees on the Mask layer are all drawn below my character in the game giving an unwanted effect of my character walking over the entire tree.
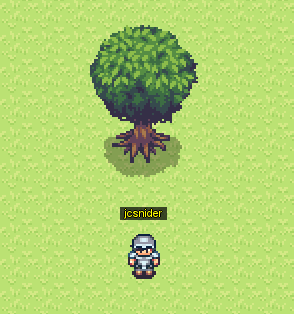
The solution isn’t as simple as moving the whole tree to the Fringe layer, we don’t want the tree trunk to be above my character , we need to find a compromise.
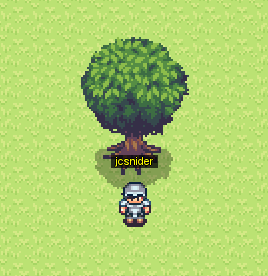
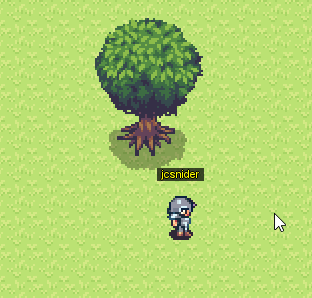
The solution in this case is to place the bottom half of the tree on the Mask layer, and the top half of the tree on the Fringe layer.
We finally end up with the effect that we’re looking for all thanks to layers!
Attributes
If you followed the steps above you probably noticed a big flaw in our game right now. You can walk through the tree!
No worries though, this section will help fix that! Attributes are like a sixth layer of the map. Attributes allow you to place tiles with special properties such as being blocks that players cannot pass.
Go back to your editor and open the Attributes tab in the Map Layers panel. Select the Block attribute and place it over the trunk of your tree.
Using the Block attribute you will find that you finally have a tree that renders correctly and, despite your best efforts, you won’t be able to phase through.
You won’t use any attribute more than the Block attribute. That being said here is a quick rundown of the rest of the attributes and what they do.